 |
 |
 |
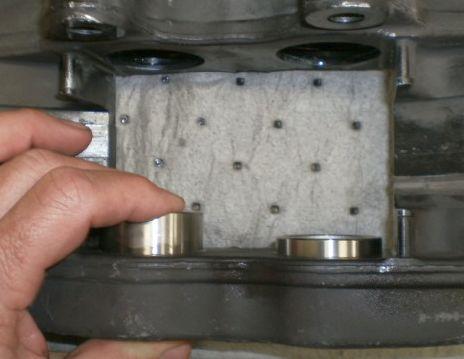
| 1. Begin by removing the pad retainer and the brake pads. Replace them with wear plates or thin wood strips such as paint stir sticks. Here we used wear plates. Push on the brake pedal. This will push the wear plates out to the rotor and expose nearly all of the piston. |
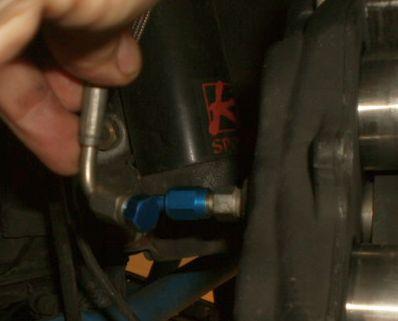
2.With the pistons exposed on both side use a cap and plug kit to seal up both the caliper and the stainless steel line feed. This will keep things clean and prevent the line from making a further mess. When capped off remove the calipers from the vehicle. |
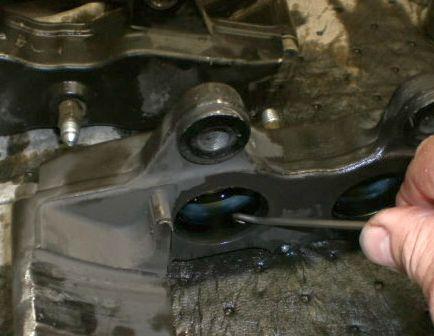
3.With the calipers on the work bench use your fingers or our piston wrenches to wiggle out the pistons from the caliper body. Avoid the temptation to blast them with air pressure as that will only pop out one piston and leave you with three in the body. If you must move them farther block up some materials between the body halves before applying pressure. |
| |
 |
 |
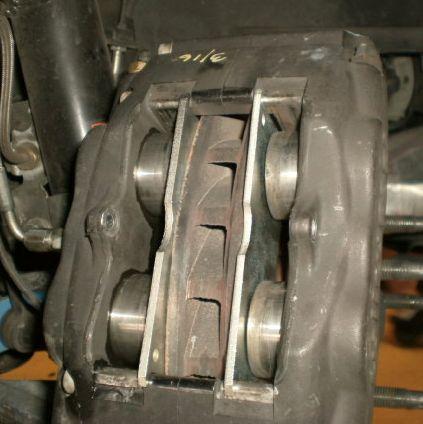
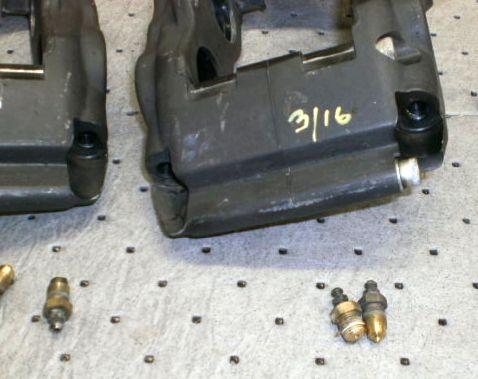
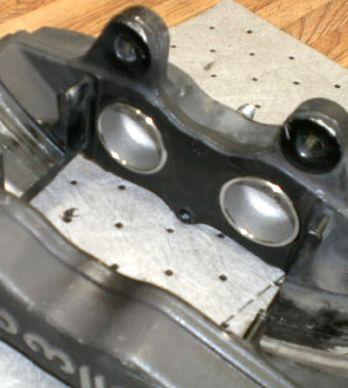
| 4. On this caliper note the contact from the caliper body to the rotor. This is from either poor alignment or the fit of rotors too large for the application. At this point there's little we can do but file down any sharp edges to prevent finger cuts. |
5. With the pistons removed use a "pick" to pull the square cut o-ring from its groove. Be careful not to damage the aluminum. The seals should come out easily without much force. |
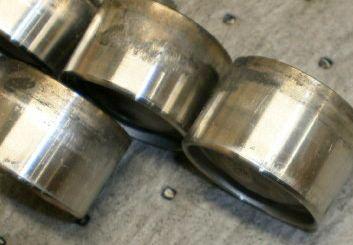
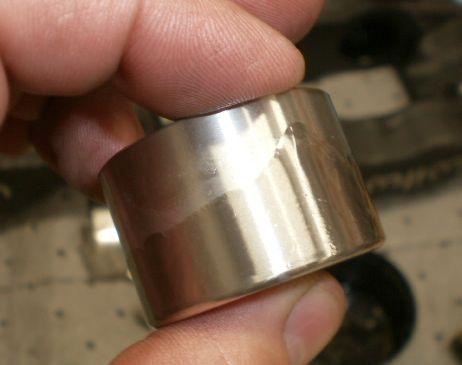
6. Inspect the pistons to determine their re use. Here we are going to opt for new pistons. Looking closely at the seat of the pistons the chafing and scratches appear greater than we'd like. Also at the top of each piston there is more pitting and scratches. Both can lead to a cut or leaky seal. *If you have older Wilwood calipers with the stamped SS pistons now is a good time to replace them. |
 |
 |
 |
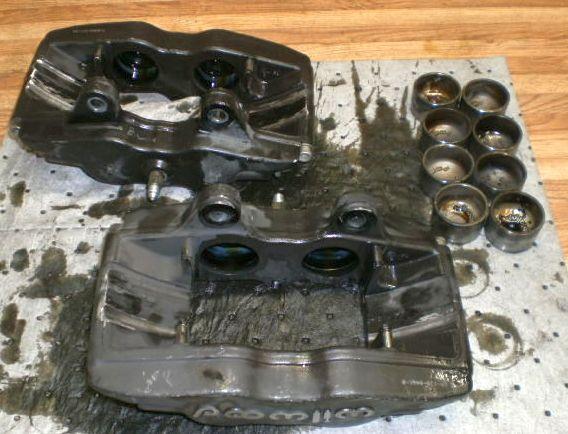
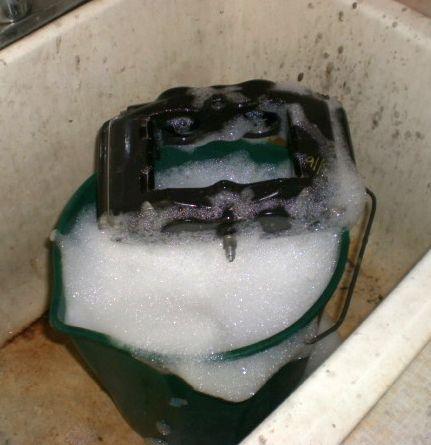
| 7. With the bodies stripped wash them in some water and detergent such as Simple Green. Agitate them in a bucket of soapy water. Blow dry the calipers and re inspect them for any damages or debris found in the bores. Blow out the cross feed section of the caliper, the bleeder ports and everything to be certain of no debris in the body. Further exterior cleaning and detail work is up to the individual. Here we're looking to make the calipers functional and safe for a racing application. How much effort you want to put into the appearances is up to you. |
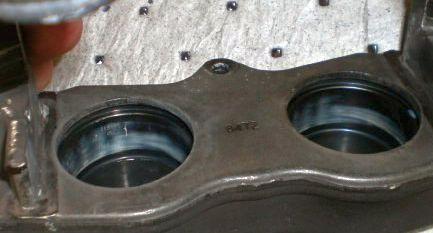
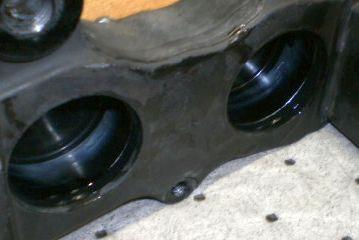
8. Inspect the caliper body bores. Looking inside we see signs of bore contact from the pistons being cocked or misaligned when used. This is a common problem when using "equal bore" calipers which can lead to pad taper wear. That wear in turn leads to excessive pressure being applied to one side of the piston and its related bore. Here it's evident but not extreme. Running a finger nail over the bore if you can feel a ridge it's time to replace the caliper body- or entire part. |
9. Remove the bridge wear plates or tension clips and bleeder fittings from the caliper. The tension clips will be cleaned, bent slightly and refit. The bleeders will be replaced. Note that someone has fit the incorrect bleeder to one of the calipers. The FSLI is an M10-1.0 taper fit fitting, NOT a 1/8"npt pipe thread fitting. Having the proper part and doing it right might just save you from a damaged caliper. We advise against removing the cross feed seals unless a leak is evident. Damages to the body from the bolt thread locking compound can occur. Removal of exterior cross tubes is also not normally required and necessitate a custom ground wrench to do so. If it's not leaking; leave it alone. |
 |
 |
 |
| 11. Wilwood Assembly Lube is no longer available. Use a liberal amount of brake fluid on both the seals and the pistons. Alternatively spray the pistons with a light mist of silicone spray (not WD40 and don't soak the seals in it) before installing the pistons to the caliper. |
12. Install the seals one at a time back into the caliper body. Be certain they do not roll and are the right size for the caliper. |
13. Polish the pistons with some scotchbrite pads to buff them of all build up and light scratches, blow dry and get ready for assembly. Using the same cup of Assembly Lube apply a small amount around the base of each new Stainless Steel piston. |
 |
 |
 |
| 14. Place the lubricated piston into the caliper bore and wiggle it around to find its centering seat location. Once you feel it find its home gently push the piston down into the body until its seated. This does NOT require excessive force or tools. Your fingers should be able to do this with ease. If not its not seated square to the bore. |
15. With the pistons in place fit the new bleeder fittings to the caliper body. M10 fittings should be tightened down snug to the bore and the 1/8npt (not shown here) are fit about half way down their tapered thread. |
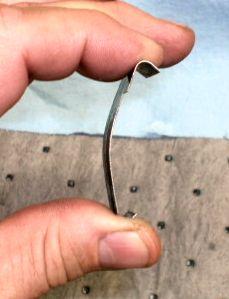
16. Place the tension clips between your fingers and put a slight bend into them. |
 |
|
 |
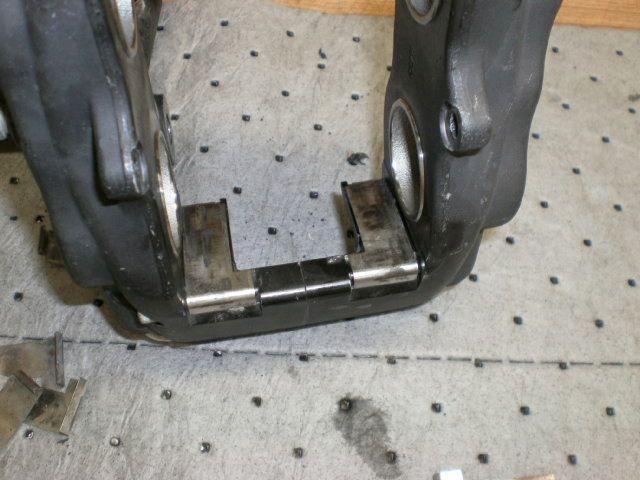
| 17. Re fit the tension clips to the caliper body. Cap the inlet fitting for transport and mounting to prevent any contamination. |
|
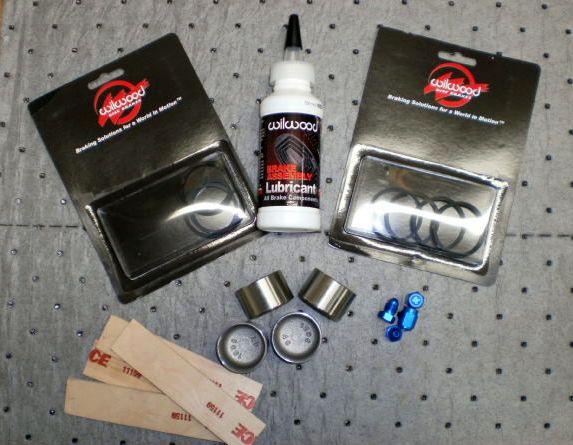
Here are the parts often needed for your service: Seal Kits, Caps and Plugs, Assembly Lube, New Pistons, and shims or paint sticks to replace pads when extracting the pistons under pressure. |